
Topics Covered In This Chapter:
- Software Libraries
- Installing Pygame
- Graphical user interfaces (GUI)
- Drawing primitives
- Creating a GUI window with Pygame
- Color in Pygame
- Fonts in Pygame
- Aliased and Anti-Aliased Graphics
- Attributes
- The pygame.font.Font Data Type
- The pygame.Surface Data Type
- The pygame.Rect Data Type
- The pygame.PixelArray Data Type
- Constructor Functions
- The type() Function
- Pygame's Drawing Functions
- The blit() Method for Surface Objects
- Events
- The Game Loop
- Animation
So far, all of our games have only used text. Text is displayed on the screen as output, and the player types in text from the keyboard as input. This is simple, and an easy way to learn programming. But in this chapter, we will make some more exciting games with advanced graphics and sound using the Pygame library. Chapters 17, 18, and 19 will teach you how to use the Pygame library to make games with graphics, animation, mouse input, and sound. In these chapters we'll write source code for simple programs that are not games but demonstrate the Pygame concepts we've learned. Chapter 20 will present the source code for a complete Pygame game using all the concepts you've learned.
A software library is code that is not meant to be run by itself, but included in other programs to add new features. By using a library a programmer doesn't have to write the entire program, but can make use of the work that another programmer has done before them. Pygame is a software library that has modules for graphics, sound, and other features that games commonly use.
Installing Pygame
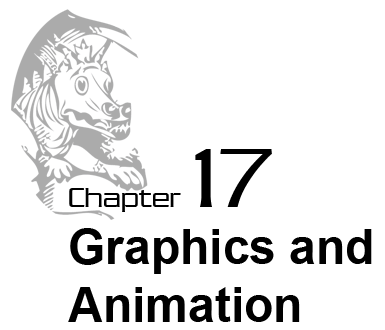
Pygame does not come with Python. Like Python, Pygame is available for free. You will have to download and install Pygame, which is as easy as downloading and installing the Python interpreter. In a web browser, go to the URL http://pygame.org and click on the "Downloads" link on the left side of the web site. This book assumes you have the Windows operating system, but Pygame works the same for every operating system. You need to download the Pygame installer for your operating system and the version of Python you have installed (3.1).
You do not want to download the "source" for Pygame, but rather the Pygame "binary" for your operating system. For Windows, download the pygame-1.9.1.win32-py3.1.msi file. (This is Pygame for Python 3.1 on Windows. If you installed a different version of Python (such as 2.5 or 2.4) download the .msi file for your version of Python.) The current version of Pygame at the time this book was written is 1.9.1. If you see a newer version on the website, download and install the newer Pygame. For Mac OS X and Linux, follow the directions on the download page for installation instructions.
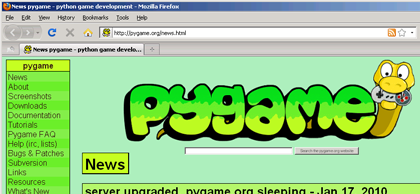
Figure 17-1: The pygame.org website.
On Windows, double click on the downloaded file to install Pygame. To check that Pygame is install correctly, type the following into the interactive shell:
>>> import pygame
If nothing appears after you hit the Enter key, then you know Pygame has successfully been installed. If the error ImportError: No module named pygame appears, then try to install Pygame again (and make sure you typed import pygame correctly).
This chapter has five small programs that demonstrate how to use the different features that Pygame provides. In the last chapter, you will use these features for a complete game written in Python with Pygame.
A video tutorial of how to install Pygame is available from this book's website at http://inventwithpython.com/videos/.
Hello World in Pygame
We are going to create a new "Hello World!" program, just like you created at the beginning of the book. This time, we will use Pygame to make "Hello world!" appear in a graphical user interface (GUI, which is pronounced "gooey") window. A graphical user interface gives you a window that color, shapes, and images can be drawn on by your program, as well as accepting mouse input (and not just keyboard input). The basic shapes that we draw on the screen are called drawing primitives. GUI windows are used instead of the text window (also called a console window or a terminal window) that we used for all our previous games.
Pygame does not work well with the interactive shell because it relies on a game loop (we will describe game loops later). Because of this, you can only write Pygame programs and cannot send instructions to Pygame one at a time through the interactive shell.
Pygame programs also do not use the input() function. There is no text input and output. Instead, the program displays output in a window by drawing graphics and text to the window. Pygame program's input comes from the keyboard and the mouse through things called events, which we will go over in the next chapter. However, if our program has bugs that cause Python to display an error message, the error message will show up in the console window.
You can also look up information about how to use the Pygame library by visiting the web site http://pygame.org/docs/ref/.
Hello World's Source Code
Type in the following code into the file editor, and save it as pygameHelloWorld.py. Or you can download this source code by going to this book's website at http://inventwithpython.com/chapter17
pygameHelloWorld.py
This code can be downloaded from http://inventwithpython.com/pygameHelloWorld.py
If you get errors after typing this code in, compare it to the book's code with the online diff tool at http://inventwithpython.com/diff or email the author at al@inventwithpython.com
This code can be downloaded from http://inventwithpython.com/pygameHelloWorld.py
If you get errors after typing this code in, compare it to the book's code with the online diff tool at http://inventwithpython.com/diff or email the author at al@inventwithpython.com
- import pygame, sys
- from pygame.locals import *
- # set up pygame
- pygame.init()
- # set up the window
- windowSurface = pygame.display.set_mode((500, 400), 0, 32)
- pygame.display.set_caption('Hello world!')
- # set up the colors
- BLACK = (0, 0, 0)
- WHITE = (255, 255, 255)
- RED = (255, 0, 0)
- GREEN = (0, 255, 0)
- BLUE = (0, 0, 255)
- # set up fonts
- basicFont = pygame.font.SysFont(None, 48)
- # set up the text
- text = basicFont.render('Hello world!', True, WHITE, BLUE)
- textRect = text.get_rect()
- textRect.centerx = windowSurface.get_rect().centerx
- textRect.centery = windowSurface.get_rect().centery
- # draw the white background onto the surface
- windowSurface.fill(WHITE)
- # draw a green polygon onto the surface
- pygame.draw.polygon(windowSurface, GREEN, ((146, 0), (291, 106), (236, 277), (56, 277), (0, 106)))
- # draw some blue lines onto the surface
- pygame.draw.line(windowSurface, BLUE, (60, 60), (120, 60), 4)
- pygame.draw.line(windowSurface, BLUE, (120, 60), (60, 120))
- pygame.draw.line(windowSurface, BLUE, (60, 120), (120, 120), 4)
- # draw a blue circle onto the surface
- pygame.draw.circle(windowSurface, BLUE, (300, 50), 20, 0)
- # draw a red ellipse onto the surface
- pygame.draw.ellipse(windowSurface, RED, (300, 250, 40, 80), 1)
- # draw the text's background rectangle onto the surface
- pygame.draw.rect(windowSurface, RED, (textRect.left - 20, textRect.top - 20, textRect.width + 40, textRect.height + 40))
- # get a pixel array of the surface
- pixArray = pygame.PixelArray(windowSurface)
- pixArray[480][380] = BLACK
- del pixArray
- # draw the text onto the surface
- windowSurface.blit(text, textRect)
- # draw the window onto the screen
- pygame.display.update()
- # run the game loop
- while True:
- for event in pygame.event.get():
- if event.type == QUIT:
- pygame.quit()
- sys.exit()
Running the Hello World Program
When you run this program, you should see a new GUI window appear which looks like Figure 17-2.
What is nice about using a GUI instead of a console is that the text can appear anywhere in the window, not just after the previous text we have printed. The text can be any color or size.
One thing you may notice is that Pygame uses a lot of tuples instead of lists. Tuples are just like lists (they can contain multiple values) except they are typed with parentheses ( and ), instead of square brackets [ and]. The main difference is that once you create a tuple, you cannot change, add, or remove any values in the tuple. For technical reasons, knowing that the contents of the tuple never change allows Python to handle this data more efficiently, which is why Pygame uses tuples instead of lists.

Figure 17-2: The "Hello World" program.
Importing the Pygame Module
Let's go over each of these lines of code and find out what they do.
- import pygame, sys
- from pygame.locals import *
First we need to import the pygame module so we can call the functions in the Pygame software library. You can import several modules on the same line by delimiting the module names with commas. Line 1 imports both the pygame and sys modules.
The second line imports the pygame.locals module. This module contains many constant variables that we will use with Pygame such as QUIT or K_ESCAPE (which we will explain later). However, using the form from moduleName import * we can import the pygame.locals module but not have to type pygame.locals in front of each time we use the module's functions and variables in our program. The* symbol means we should import everything inside the module.
The pygame.locals module contains some constant variables we will use in this program.
If you have from sys import * instead of import sys in your program, you could call exit() instead of sys.exit() in your code. (But most of the time it is better to use the full function name so that you know which module the exit() is in.)
The pygame.init() Function
- # set up pygame
- pygame.init()
The Pygame software library has some initial code that needs to be run before we can use it. All Pygame programs must run this code by calling the pygame.init() after importing the pygame module but before calling any other Pygame functions.
The pygame.display.set_mode() and pygame.display.set_caption() Functions
- # set up the window
- windowSurface = pygame.display.set_mode((500, 400), 0, 32)
- pygame.display.set_caption('Hello world!')
Line 8 creates a GUI window for our program by calling the set_mode() method in the pygame.display module. (The display module is a module inside the pygame module. Pygame is so advanced that even the pygame module has its own modules!)
Just to avoid confusion, you should know the difference between the window that is created is different and the Windows operating system. The graphical user interface is printed as "window" (lower case and singular) and the Microsoft operating system is "Windows" (upper case and plural).
There are three parameters to the set_mode() method. The first parameter is a tuple of two integers for the width and height of the window, in pixels. A pixel is the tiniest dot on your computer screen. A single pixel on your screen can turn into any color. All the pixels on your screen work together to display all the pictures you see. To see how tiny a pixel is, look at the bottom right corner of the "Hello World!" window. This program sets just one pixel as white.
We want the window to be 500 pixels wide and 400 pixels high, so we use the tuple (500, 400) for the first parameter. To get the total number of pixels in our window, multiply the width and the height. Our window is made up of 20,000 pixels, and it doesn't even take up the entire computer screen!
The second parameter is for advanced GUI window options. You won't really need this for your games, so you can always just pass 0 for this parameter. The third parameter is another advanced option called the color depth. You also don't need to know what this means, and can just always pass the value 32.
The set_caption() call returns a pygame.Surface object (which we will call Surface objects for short). Objects are values of a data type that have methods as well as data. For example, strings are objects in Python because they have data (the string itself) and methods (such as lower() and split()). You can store references to objects in variables just like list reference values. The Surface object represents the window and we will include the windowSurface variable in all of our calls to drawing functions.
To refresh your memory about the differences between values and reference values, go back to chapter 10.
Colors in Pygame
- # set up the colors
- BLACK = (0, 0, 0)
- WHITE = (255, 255, 255)
- RED = (255, 0, 0)
- GREEN = (0, 255, 0)
- BLUE = (0, 0, 255)
There are three primary colors of light: red, green and blue. By combining different amounts of these three colors you can form any other color. In Python, we represent colors with tuples of three integers. The first value in the tuple is how much red is in the color. A value of 0 means there is no red in this color, and a value of 255 means there is a maximum amount of red in the color. The second value is for green and the third value is for blue.
For example, we will create the tuple (0, 0, 0) and store it in a variable named BLACK. With no amount of red, green, or blue, the resulting color is completely black. The color black is the absence of any color.
On line 13, we use the tuple (255, 255, 255) for a maximum amount of red, green, and blue to result in white. The color white is the full combination of red, green, and blue. We store this tuple in the WHITE variable. The tuple (255, 0, 0) represents the maximum amount of red but no amount of green and blue, so the resulting color is red. Similarly, (0, 255, 0) is green and (0, 0, 255) is blue.
These variable names are in all capitals because they are constant variables. It's just easier to type BLACK in our code than (0, 0, 0) every time we want to specify the color black, so we set up these color variables at the start of our program.
If you want to make a color lighter, try adding an equal amount from all three values. For example, the RGB value for gray is (128, 128, 128). You can get the RGB value for a lighter gray by adding 20 to each value to get (148, 148, 148). You can get the RGB value for a darker gray by subtracting 20 from each value to get (108, 108, 108). And you can get the RGB value for a slightly redder gray by adding 20 to only the red value to get (148, 128, 128). Table 17-1 has some common colors and their RGB values.
|
Fonts, and the pygame.font.SysFont() Function
- # set up fonts
- basicFont = pygame.font.SysFont(None, 48)
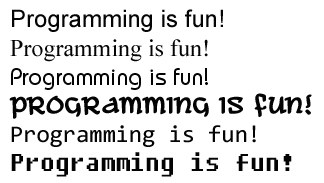 Figure 17-3: Examples of different fonts.
A font is a complete set of letters, numbers, symbols, and characters drawn in a single style. Figure 17-3 is an example of the same sentence printed in different fonts.
In our earlier games, we only told Python to print out text. The color, size, and font that was used to display this text was completely determined by whatever font your operating system uses for console windows. Our programs could not change the font at all. However, since we will be drawing out letters to a GUI window we need to tell Pygame exactly what font to use when drawing the text.
On line 19 we create a pygame.font.Font object (which we will just call Font objects for short) by calling the pygame.font.SysFont()function. The first parameter is the name of the font, but we will pass the None value to use the default system font. The second parameter will be the size of the font (which is measured in units called points). In our call on line 19, we want the font size to be 48 points.
|
The render() Method for Font Objects
- # set up the text
- text = basicFont.render('Hello world!', True, WHITE, BLUE)
- textRect = text.get_rect()
 Figure 17-4: An aliased line and an anti-aliased line.
The Font object that we have stored in the basicFont variable has a method called render(). This method will create a Surface object with the text drawn on it. The first parameter to render() is the string of the text to draw. The second parameter is a Boolean for whether or not we want anti-aliasing. Anti-aliasing is a technique for making a drawing look less blocky. On line 22, we pass True to say we want to use anti-aliasing. Figure 17-4 is an example of what a line (when we enlarge the individual pixels) looks like with and without anti-aliasing.
Anti-aliasing can make your text and lines look blurry but smoother. It takes a little more computation time to do anti-aliasing, so although the graphics may look better, your program may run slower (but only just a little).
|
Attributes
- textRect.centerx = windowSurface.get_rect().centerx
- textRect.centery = windowSurface.get_rect().centery
The pygame.Rect data type (which we will just call Rect for short) makes working with rectangle-shaped things easy. To create a new Rect object call the function pygame.Rect(). The parameters are integers for the XY coordinates of the top left corner, followed by the width and height. These integers describe the size in number of pixels.
The function name with the parameters looks like this: pygame.Rect(left, top, width, height)
Just like methods are functions that are associated with an object, attributes are variables that are associated with an object. The Rect data type (that is, the data type of all Rect objects) has many attributes that describe the rectangle they represent. Here is a list of attributes of a Rect object named myRect:
| pygame.Rect Attribute | Description |
|---|---|
| myRect.left | The int value of the X-coordinate of the left side of the rectangle. |
| myRect.right | The int value of the X-coordinate of the right side of the rectangle. |
| myRect.top | The int value of the Y-coordinate of the top side of the rectangle. |
| myRect.bottom | The int value of the Y-coordinate of the bottom side of the rectangle. |
| myRect.centerx | The int value of the X-coordinate of the center of the rectangle. |
| myRect.centery | The int value of the Y-coordinate of the center of the rectangle. |
| myRect.width | The int value of the width of the rectangle. |
| myRect.height | The int value of the height of the rectangle. |
| myRect.size | A tuple of two ints: (width, height) |
| myRect.topleft | A tuple of two ints: (left, top) |
| myRect.topright | A tuple of two ints: (right, top) |
| myRect.bottomleft | A tuple of two ints: (left, bottom) |
| myRect.bottomright | A tuple of two ints: (right, bottom) |
| myRect.midleft | A tuple of two ints: (left, centery) |
| myRect.midright | A tuple of two ints: (right, centery) |
| myRect.midtop | A tuple of two ints: (centerx, top) |
| myRect.midbottom | A tuple of two ints: (centerx, bottom) |
The great thing about Rect objects is that if you modify any of these variables, all the other variables will automatically modify themselves as well. For example, if you create a Rect object that is 20 pixels wide and 20 pixels high, and has the top left corner at the coordinates (30, 40), then the X-coordinate of the right side will automatically be set to 50 (because 20 + 30 = 50). However, if you change the left attribute with the linemyRect.left = 100, then Pygame will automatically change the right attribute to 120 (because 20 + 100 = 120). Every other attribute for that Rect object will also be updated as well.
The get_rect() Methods for pygame.font.Font and pygame.Surface Objects
Notice that both the Font object (stored in the text variable) and the Surface object (stored in windowSurface variable) both have a method called get_rect(). Technically, these are two different methods. But the programmers of Pygame gave them the same name because they both do the same thing and return Rect objects that represent the size and position of the Font or Surface object.
Also, remember that pygame is a module that we import, and inside the pygame module are the font and surface modules. Inside those modules are the Font and Surface data types. The Pygame programmers made the modules begin with a lowercase letter, and the data types begin with an uppercase letter. This makes it easier to distinguish the data types and the modules that the data types can be found in.
Constructor Functions and the type() function.
We create a pygame.Rect object by calling a function named pygame.Rect(). The pygame.Rect() function has the same name as the pygame.Rect data type. Functions that have the same name as their data type and create objects or values of this data type are called constructor functions.
You can always find out what the proper name of a value's data type with the type() function. For example, try typing the following into the interactive shell:
>>> type('This is a string')
<type 'str'>
>>> type(5)
<type 'int'>
>>> spam = 'Another string'
>>> type(spam)
<type 'str'>
>>> import pygame
>>> pygame.init()
>>> myRect = pygame.Rect(10, 10, 40, 50)
>>> type(myRect)
<type 'pygame.Rect'>
>>> pygame.quit()
<type 'str'>
>>> type(5)
<type 'int'>
>>> spam = 'Another string'
>>> type(spam)
<type 'str'>
>>> import pygame
>>> pygame.init()
>>> myRect = pygame.Rect(10, 10, 40, 50)
>>> type(myRect)
<type 'pygame.Rect'>
>>> pygame.quit()
(You need to call the pygame.quit() function when you are done with typing Pygame functions into the interactive shell. Otherwise you may cause Python to crash.) Notice that the return value from the type()function is not a string, but a value of a data type called "type"! Try typing this into the interactive shell:
>>> type(type('This is a string'))
<type 'type'>
<type 'type'>
For the most part, you don't need to know about data types and the type() function when programming games. But it can be very useful if you need to find out the data type of the value stored in a variable in your program.
The fill() Method for Surface Objects
- # draw the white background onto the surface
- windowSurface.fill(WHITE)
This is the first drawing function call in our program. We want to fill the entire surface stored in windowSurface with the color white. The fill() function will completely cover the entire surface with the color we pass as the parameter. (In this case, we pass WHITE to make the background white.)
An important thing to know about Pygame is that the window on the screen will not change when we call the fill() method or any of the other drawing functions. These will draw on the Surface object, but theSurface object will not be drawn on the user's screen until the pygame.display.update() function is called. This is because drawing on the Surface object (which is stored in the computer's memory) is much faster than drawing to the computer screen. It is much more efficient to draw onto the screen once and only after all of our drawing functions to draw to the surface.
The pygame.draw.polygon() Function
- # draw a green polygon onto the surface
- pygame.draw.polygon(windowSurface, GREEN, ((146, 0), (291, 106), (236, 277), (56, 277), (0, 106)))
A polygon is any multisided shape with sides that are only straight lines. The pygame.draw.polygon() function can draw any shape that you give it and fill the inside space of the polygon. The tuple of tuples you pass it represents the XY coordinates of the points to draw in order. The last tuple will automatically connect to the first tuple to complete the shape.
Figure 17-5: Examples of Polygons.
Polygons only have straight lines for sides (circles and ellipses are not polygons). Figure 17-5 has some examples of polygons.
The pygame.draw.line() Function
- # draw some blue lines onto the surface
- pygame.draw.line(windowSurface, BLUE, (60, 60), (120, 60), 4)
- pygame.draw.line(windowSurface, BLUE, (120, 60), (60, 120))
- pygame.draw.line(windowSurface, BLUE, (60, 120), (120, 120), 4)
The pygame.draw.line() function will draw a line on the Surface object that you provide. Notice that the last parameter, the width of the line, is optional. If you pass 4 for the width, the line will be four pixels thick. If you do not specify the width parameter, it will take on the default value of 1.
The pygame.draw.circle() Function
- # draw a blue circle onto the surface
- pygame.draw.circle(windowSurface, BLUE, (300, 50), 20, 0)
The pygame.draw.circle() function will draw a circle on the Surface object you provide. The third parameter is for the X and Y coordinates of the center of the circle as a tuple of two ints. The fourth parameter is an int for the radius (that is, size) of the circle in pixels. A width of 0 means that the circle will be filled in.
The pygame.draw.ellipse() Function
- # draw a red ellipse onto the surface
- pygame.draw.ellipse(windowSurface, RED, (300, 250, 40, 80), 1)
The pygame.draw.ellipse() function will draw an ellipse. It is similar to the pygame.draw.circle() function, except that instead of specifying the center of the circle, a tuple of four ints is passed for the left, top, width, and height of the ellipse.
The pygame.draw.rect() Function
- # draw the text's background rectangle onto the surface
- pygame.draw.rect(windowSurface, RED, (textRect.left - 20, textRect.top - 20, textRect.width + 40, textRect.height + 40))
The pygame.draw.rect() function will draw a rectangle. The third parameter is a tuple of four ints for the left, top, width, and height of the rectangle. Instead of a tuple of four ints for the third parameter, you can also pass a Rect object. In line 45, we want the rectangle we draw to be 20 pixels around all the sides of the text. This is why we want the drawn rectangle's left and top to be the left and top of textRect minus 20. (Remember, we subtract because coordinates decrease as you go left and up.) And the width and height will be equal to the width and height of the textRect plus 40 (because the left and top were moved back 20 pixels, so we need to make up for that space).
The pygame.PixelArray Data Type
- # get a pixel array of the surface
- pixArray = pygame.PixelArray(windowSurface)
- pixArray[480][380] = BLACK
On line 48 we create a pygame.PixelArray object (which we will just call a PixelArray object for short). The PixelArray object is a list of lists of color tuples that represents the Surface object you passed it. We passed windowSurface object when we called the PixelArray() constructor function on line 48, so assigning BLACK to pixArray[480][380] will change the pixel at the coordinates (480, 380) to be a black pixel. Pygame will automatically modify the windowSurface object with this change.
The first index in the PixelArray object is for the X-coordinate. The second index is for the Y-coordinate. PixelArray objects make it easy to set individual pixels on a PixelArray object to a specific color.
- del pixArray
Creating a PixelArray object from a Surface object will lock that Surface object. Locked means that no blit() function calls (described next) can be made on that Surface object. To unlock theSurface object, you must delete the PixelArray object with the del operator. If you forget to delete the Surface object, you will get an error message that says pygame.error: Surfaces must not be locked during blit.
The blit() Method for Surface Objects
- # draw the text onto the surface
- windowSurface.blit(text, textRect)
The blit() method will draw the contents of one Surface object onto another Surface object. Line 54 will draw the "Hello world!" text (which was drawn on the Surface object stored in the textvariable) and draws it to the Surface object stored in the windowSurface variable.
Remember that the text object had the "Hello world!" text drawn on it on line 22 by the render() method. Surface objects are just stored in the computer's memory (like any other variable) and not drawn on the screen. The Surface object in windowSurface is drawn on the screen when we call the pygame.display.update() function on line 56 because this was the Surface object created by thepygame.display.set_mode() function. Other Surface objects are not drawn on the screen.
The second parameter to blit() specifies where on the windowSurface surface the text surface should be drawn. We will just pass the Rect object we got from calling text.get_rect() (which was stored in textRect on line 23).
The pygame.display.update() Function
- # draw the window onto the screen
- pygame.display.update()
In Pygame, nothing is drawn to the screen until the pygame.display.update() function is called. This is done because drawing to the screen is a slow operation for the computer compared to drawing on theSurface objects while they are in memory. You do not want to draw to the screen after each drawing function is called, but only draw the screen once after all the drawing functions have been called.
You will need to call pygame.display.update() each time you want to update the screen to display the contents of the Surface object returned by pygame.display.set_mode(). (In this program, that object is the one stored in windowSurface.) This will become more important in our next program which covers animation.
Events and the Game Loop
In our previous games, all of the programs print out everything immediately until they reach a input() function call. At that point, the program stops and waits for the user to type something in and press Enter. Pygame programs do not work this way. Instead, Pygame programs are constantly running through a loop called the game loop. (In this program, we execute all the lines of code in the game loop about one hundred times a second.)
The game loop is a loop that constantly checks for new events, updates the state of the window, and draws the window on the screen. Events are objects of the pygame.event.Event data type that are generated by Pygame whenever the user presses a key, clicks or moves the mouse, or makes some other event occur. Calling pygame.event.get() retrieves any new pygame.event.Event objects that have been generated since the last call to pygame.event.get().
- # run the game loop
- while True:
This is the start of our game loop. The condition for the while statement is set to True so that we loop forever. The only time we exit the loop is if an event causes the program to terminate.
The pygame.event.get() Function
- for event in pygame.event.get():
- if event.type == QUIT:
The pygame.event.get() function returns a list of pygame.event.Event objects. This list has every single event that has occurred since the last time pygame.event.get() was called. Allpygame.event.Event objects have an attribute called type which tell us what type of event it is. (A list of event types is given in the next chapter. In this chapter we only deal with the QUIT event.)
Pygame comes supplied with its own constant variables in the pygame.locals module. Remember that we have imported the pygame.locals module with the line from pygame.locals import *, which means we do not have to type pygame.locals in front of the variables and functions in that module.
On line 60 we set up a for loop to check each pygame.event.Event object in the list returned by pygame.event.get(). If the type attribute of the event is equal to the value of the constant variableQUIT (which is provided by the pygame.locals module), then we know the user has closed the window and wants to terminate the program.
Pygame generates the QUIT event when the user clicks on the X button at the top right of the program's window. It is also generated if the computer is shutting down and tries to terminate all the programs running. For whatever reason the QUIT event was generated, we know that we should run any code that we want to happen to stop the program. You could choose to ignore the QUIT event entirely, but that may cause the program to be confusing to the user.
The pygame.quit() Function
- pygame.quit()
- sys.exit()
If the QUIT event has been generated, then we can know that the user has tried to close the window. In that case, we should call the exit functions for both Pygame (pygame.quit()) and Python (sys.exit()).
This has been the simple "Hello world!" program from Pygame. We've covered many new topics that we didn't have to deal with in our previous games. Even though they are more complicated, the Pygame programs can also be much more fun and engaging than our previous text games. Let's learn how to create games with animated graphics that move.
Animation
In this program we have several different blocks bouncing off of the edges of the window. The blocks are different colors and sizes and move only in diagonal directions. In order to animate the blocks (that is, make them look like they are moving) we will move the blocks a few pixels over on each iteration through the game loop. By drawing new blocks that are located a little bit differently then the blocks before, we can make it look like the blocks are moving around the screen.
The Animation Program's Source Code
Type the following program into the file editor and save it as animation.py. You can also download this source code from http://inventwithpython.com/chapter17.
animation.py
This code can be downloaded from http://inventwithpython.com/animation.py
If you get errors after typing this code in, compare it to the book's code with the online diff tool at http://inventwithpython.com/diff or email the author at al@inventwithpython.com
This code can be downloaded from http://inventwithpython.com/animation.py
If you get errors after typing this code in, compare it to the book's code with the online diff tool at http://inventwithpython.com/diff or email the author at al@inventwithpython.com
- import pygame, sys, time
- from pygame.locals import *
- # set up pygame
- pygame.init()
- # set up the window
- WINDOWWIDTH = 400
- WINDOWHEIGHT = 400
- windowSurface = pygame.display.set_mode((WINDOWWIDTH, WINDOWHEIGHT), 0, 32)
- pygame.display.set_caption('Animation')
- # set up direction variables
- DOWNLEFT = 1
- DOWNRIGHT = 3
- UPLEFT = 7
- UPRIGHT = 9
- MOVESPEED = 4
- # set up the colors
- BLACK = (0, 0, 0)
- RED = (255, 0, 0)
- GREEN = (0, 255, 0)
- BLUE = (0, 0, 255)
- # set up the block data structure
- b1 = {'rect':pygame.Rect(300, 80, 50, 100), 'color':RED, 'dir':UPRIGHT}
- b2 = {'rect':pygame.Rect(200, 200, 20, 20), 'color':GREEN, 'dir':UPLEFT}
- b3 = {'rect':pygame.Rect(100, 150, 60, 60), 'color':BLUE, 'dir':DOWNLEFT}
- blocks = [b1, b2, b3]
- # run the game loop
- while True:
- # check for the QUIT event
- for event in pygame.event.get():
- if event.type == QUIT:
- pygame.quit()
- sys.exit()
- # draw the black background onto the surface
- windowSurface.fill(BLACK)
- for b in blocks:
- # move the block data structure
- if b['dir'] == DOWNLEFT:
- b['rect'].left -= MOVESPEED
- b['rect'].top += MOVESPEED
- if b['dir'] == DOWNRIGHT:
- b['rect'].left += MOVESPEED
- b['rect'].top += MOVESPEED
- if b['dir'] == UPLEFT:
- b['rect'].left -= MOVESPEED
- b['rect'].top -= MOVESPEED
- if b['dir'] == UPRIGHT:
- b['rect'].left += MOVESPEED
- b['rect'].top -= MOVESPEED
- # check if the block has move out of the window
- if b['rect'].top < 0:
- # block has moved past the top
- if b['dir'] == UPLEFT:
- b['dir'] = DOWNLEFT
- if b['dir'] == UPRIGHT:
- b['dir'] = DOWNRIGHT
- if b['rect'].bottom > WINDOWHEIGHT:
- # block has moved past the bottom
- if b['dir'] == DOWNLEFT:
- b['dir'] = UPLEFT
- if b['dir'] == DOWNRIGHT:
- b['dir'] = UPRIGHT
- if b['rect'].left < 0:
- # block has moved past the left side
- if b['dir'] == DOWNLEFT:
- b['dir'] = DOWNRIGHT
- if b['dir'] == UPLEFT:
- b['dir'] = UPRIGHT
- if b['rect'].right > WINDOWWIDTH:
- # block has moved past the right side
- if b['dir'] == DOWNRIGHT:
- b['dir'] = DOWNLEFT
- if b['dir'] == UPRIGHT:
- b['dir'] = UPLEFT
- # draw the block onto the surface
- pygame.draw.rect(windowSurface, b['color'], b['rect'])
- # draw the window onto the screen
- pygame.display.update()
- time.sleep(0.02)
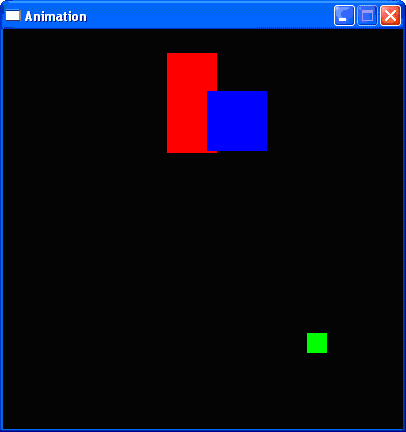
Figure 17-6: The Animation program.
How the Animation Program Works
In this program, we will have three different colored blocks moving around and bouncing off the walls. In order to do this, we need to first consider exactly how we want the blocks to move.
Moving and Bouncing the Blocks
Each block will move in one of four diagonal directions: down and left, down and right, up and left, or up and right. When the block hits the side of the window, we want it to "bounce" off the wall and move in a new diagonal direction. The blocks will bounce as shown in this picture:
The new direction that a block moves after it bounces depends on two things: which direction it was moving before the bounce and which wall it bounced off of. There are a total of eight possible ways a block can bounce: two different ways for each of the four walls. For example, if a block is moving down and right, and then bounces off of the bottom edge of the window, we want the block's new direction to be up and right.
We can represent the blocks with a Rect object to represent the position and size of the block, a tuple of three ints to represent the color of the block, and an integer to represent which of the four diagonal directions the block is currently moving. On each iteration in the game loop, we will adjust the X and Y position of the block in the Rect object. Also in each iteration we will draw all the blocks on the screen at their current position. As the program execution loops through the game loop, the blocks will gradually move across the screen so that it looks like they are smoothly moving and bouncing around on their own.
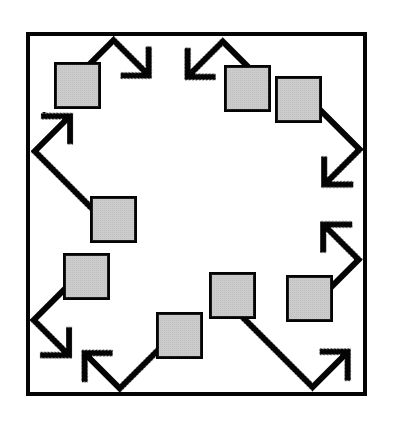
Figure 17-7: The diagram of how blocks will bounce.
Creating and Setting Up Pygame and the Main Window
- import pygame, sys, time
In this program, we also want to import the time module.
- # set up the window
- WINDOWWIDTH = 400
- WINDOWHEIGHT = 400
- windowSurface = pygame.display.set_mode((WINDOWWIDTH, WINDOWHEIGHT), 0, 32)
In this program the size of the window's width and height is used for more than just the call to set_mode(). We will use a constant variables to make the program more readable. Remember, readability is for the benefit of the programmer, not the computer. If we ever want to change the size of the window, we only have to change lines 8 and 9.
If we did not use the constant variable, we would have to change ever occurance of the int value 400. If any unrelated values in the program just happen to also be 400, we might think it was for the width or height and also accidentally change it too. This would put a bug in our program. Since the window width and height never change during the program's execution, a constant variable is a good idea.
- pygame.display.set_caption('Animation')
For this program, we will set the caption at the top of the window to 'Animation' with a call to pygame.display.set_caption().
- Setting Up Constant Variables for Direction
- # set up direction variables
- DOWNLEFT = 1
- DOWNRIGHT = 3
- UPLEFT = 7
- UPRIGHT = 9
We will use the keys on the number pad of the keyboard to remind us which belongs to which direction. This will be similar to our Tic Tac Toe game. 1 is down and left, 3 is down and right, 7 is up and left, and 9 is up and right. However, it may be hard to remember this, so instead we will use constant variables instead of these integer values.
We could use any values we wanted to for these directions instead of using a constant variable, as long as we had different values for each direction. For example, we could use the string 'downleft' to represent the down and left diagonal direction. However, if we ever mistype the 'downleft' string (for example, as 'fownleft'), the computer would not recognize that we meant to type 'downleft' instead of'downleft'. This bug would cause our program to behave strangely.
But if we use constant variables, and accidentally type the variable name FOWNLEFT instead of the name DOWNLEFT, Python would notice that there is no such variable named FOWNLEFT and crash the program with an error. This would still be a pretty bad bug, but at least we would know immediately about it and could fix it. Otherwise it may be hard to notice that there is a bug at all.
- MOVESPEED = 4
We will use a constant variable to determine how fast the blocks should move. A value of 4 here means that each block will move 4 pixels on each iteration through the game loop.
Setting Up Constant Variables for Color
- # set up the colors
- BLACK = (0, 0, 0)
- RED = (255, 0, 0)
- GREEN = (0, 255, 0)
- BLUE = (0, 0, 255)
We set up constant variables for the colors we will use. Remember, Pygame uses a tuple of three int values for the amounts of red, green, and blue called an RGB value. The integers are from 0 to 255. Unlike our "Hello World" program, this program doesn't use the white color, so we left it out.
Again, the use of constant variables is for readability. The computer doesn't care if we use a variable named GREEN for the color green. But if we later look at this program, it is easier to know that GREEN stands for the color green rather than a bunch of int values in a tuple.
Setting Up The Block Data Structures
- # set up the block data structure
- b1 = {'rect':pygame.Rect(300, 80, 50, 100), 'color':RED, 'dir':UPRIGHT}
We will set up a dictionary to be the data structure that represents each block. (Dictionaries were introduced at the end of the Hangman chapter.) The dictionary will have the keys of 'rect' (with a Rect object for a value), 'color' (with a tuple of three ints for a value), and 'dir' (with one of our direction constant variables for a value).
We will store one of these data structures in a variable named b1. This block will have its top left corner located at an X-coordinate of 300 and Y-coordinate of 80. It will have a width of 50 pixels and a height of 100 pixels. Its color will be red (so we'll use our RED constant variable, which has the tuple (255, 0, 0) stored in it). And its direction will be set to UPRIGHT.
- b2 = {'rect':pygame.Rect(200, 200, 20, 20), 'color':GREEN, 'dir':UPLEFT}
- b3 = {'rect':pygame.Rect(100, 150, 60, 60), 'color':BLUE, 'dir':DOWNLEFT}
Here we create two more similar data structures for blocks that will be different sizes, positions, colors, and directions.
- blocks = [b1, b2, b3]
On line 31 we put all of these data structures in a list, and store the list in a variable named blocks.
blocks is a list. blocks[0] would be the dictionary data structure in b1. blocks[0]['color'] would be the 'color' key in b1 (which we stored the value in RED in), so the expression blocks[0]['color'] would evaluate to (255, 0, 0). In this way we can refer to any of the values in any of the block data structures by starting with blocks.
Running the Game Loop
- # run the game loop
- while True:
Inside the game loop, we want to move all of the blocks around the screen in the direction that they are going, then bounce the block if they have hit a wall, then draw all of the blocks to the windowSurface surface, and finally call pygame.display.update() to draw the surface to the screen. Also, we will call pygame.event.get() to check if the QUIT event has been generated by the user closing the window.
The for loop to check all of the events in the list returned by pygame.event.get() is the same as in our "Hello World!" program, so we will skip its explanation and go on to line 44.
- # draw the black background onto the surface
- windowSurface.fill(BLACK)
Before we draw any of the blocks on the windowSurface surface, we want to fill the entire surface with black so that anything we previously drew on the surface is covered. Once we have blacked out the entire surface, we can redraw the blocks with the code below.
Moving Each Block
- for b in blocks:
We want to update the position of each block, so we must loop through the blocks list and perform the same code on each block's data structure. Inside the loop, we will refer to the current block as simply r so it will be easy to type.
- # move the block data structure
- if b['dir'] == DOWNLEFT:
- b['rect'].left -= MOVESPEED
- b['rect'].top += MOVESPEED
- if b['dir'] == DOWNRIGHT:
- b['rect'].left += MOVESPEED
- b['rect'].top += MOVESPEED
- if b['dir'] == UPLEFT:
- b['rect'].left -= MOVESPEED
- b['rect'].top -= MOVESPEED
- if b['dir'] == UPRIGHT:
- b['rect'].left += MOVESPEED
- b['rect'].top -= MOVESPEED
The new value that we want to set the left and top attributes to depends on the direction the block is moving. Remember that the X-coordinates start at 0 on the very left edge of the window, and increase as you go right. The Y-coordinates start at 0 on the very top of the window, and increase as you go down. So if the direction of the block (which, remember, is stored in the 'dir' key) is either DOWNLEFT or DOWNRIGHT, we want to increase the top attribute. If the direction is UPLEFT or UPRIGHT, we want to decrease the top attribute.
If the direction of the block is DOWNRIGHT or UPRIGHT, we want to increase the left attribute. If the direction is DOWNLEFT or UPLEFT, we want to decrease the left attribute.
We could have also modified right instead of the left attribute, or the bottom attribute instead of the top attribute, because Pygame will update the Rect object either way. Either way, we want to change the value of these attributes by the integer stored in MOVESPEED, which stores how many pixels over we will move the block.
Checking if the Block has Bounced
- # check if the block has move out of the window
- if b['rect'].top < 0:
- # block has moved past the top
- if b['dir'] == UPLEFT:
- b['dir'] = DOWNLEFT
- if b['dir'] == UPRIGHT:
- b['dir'] = DOWNRIGHT
After we have moved the block, we want to check if the block has gone past the edge of the window. If it has, we want to "bounce" the block, which in the code means set a new value for the block's 'dir' key. When the direction is set, the block will move in the new direction on the next iteration of the game loop.
We need to check if the block has moved passed each of the four edges of the window. In the above if statement, we decide the block has moved past the top edge of the window if the block's Rect object's topattribute is less than 0. If it is, then we need to change the direction based on what direction the block was moving.
Changing the Direction of the Bouncing Block
Look at the bouncing diagram earlier in this chapter. In order to move past the top edge of the window, the block had to either be moving in the UPLEFT or UPRIGHT directions. If the block was moving in theUPLEFT direction, the new direction (according to our bounce diagram) will be DOWNLEFT. If the block was moving in the UPRIGHT direction, the new direction will be DOWNRIGHT.
- if b['rect'].bottom > WINDOWHEIGHT:
- # block has moved past the bottom
- if b['dir'] == DOWNLEFT:
- b['dir'] = UPLEFT
- if b['dir'] == DOWNRIGHT:
- b['dir'] = UPRIGHT
Here we see if the block has moved past the bottom edge of the window by checking if the bottom attribute (not the top attribute) is greater than the value in WINDOWHEIGHT. Remember that the Y-coordinates start at 0 at the top of the window and increase to WINDOWHEIGHT because we passed WINDOWHEIGHT as the height in our call to pygame.display.set_mode().
The rest of the code changes the direction based on what our bounce diagram says.
- if b['rect'].left < 0:
- # block has moved past the left side
- if b['dir'] == DOWNLEFT:
- b['dir'] = DOWNRIGHT
- if b['dir'] == UPLEFT:
- b['dir'] = UPRIGHT
This is similar to the above code, but checks if the left side of the block has moved to the left of the left edge of the window. Remember, the X-coordinates start at 0 on the left edge of the window and increase toWINDOWWIDTH on the right edge of the window.
- if b['rect'].right > WINDOWWIDTH:
- # block has moved past the right side
- if b['dir'] == DOWNRIGHT:
- b['dir'] = DOWNLEFT
- if b['dir'] == UPRIGHT:
- b['dir'] = UPLEFT
This code is similar to the previous pieces of code, but it checks if the block has moved past the rightmost edge of the window.
Drawing the Blocks on the Window in Their New Positions
- # draw the block onto the surface
- pygame.draw.rect(windowSurface, b['color'], b['rect'])
Now that we have moved the block (and set a new direction if the block has bounced off the window's edges), we want to draw it on the windowSurface surface. We can draw this using thepygame.draw.rect() function. We pass windowSurface, because that is the Surface object we want to draw on. We pass the b['color'] value, because this is the color we want to use. Then we pass b['rect'], because that Rect object has the information about the position and size of the rectangle we want to draw.
This is the last line of the for loop. We want to run the moving, bouncing, and drawing code on each of the blocks stored in the blocks list, which is why we loop through each of them. Also, if we wanted to add new blocks or remove blocks from our program, we only have to modify the blocks list and the rest of the code still works.
Drawing the Window on the Screen
- # draw the window onto the screen
- pygame.display.update()
- time.sleep(0.02)
After we have run this code on each of the blocks in the blocks list, we want to finally call pygame.display.update() so that the windowSurface surface is draw on the screen. After this line, we loop back to the start of the game loop and begin the process all over again. This way, the blocks are constantly moving a little, bouncing off the walls, and being drawn on the screen in their new positions. Meanwhile, we also check if the QUIT event has been generated by the Pygame library (which happens if the player closes the window or shuts down their computer). In that case we terminate the program.
The call to the time.sleep() function is there because the computer can move, bounce, and draw the blocks so fast that if the program ran at full speed, all the blocks would just look like a blur. (Try commenting out the time.sleep(0.02) line and running the program to see this.) This call to time.sleep() will stop the program for 20 milliseconds. There are 1000 milliseconds in a second, so 0.001 seconds equals 1 millisecond and 0.02 equals 20 milliseconds.
Some Small Modifications
Drawing as Fast as Possible
Just for fun, let's make some small modifications to our program so we can see what it does. Try adding a # in front of line 90 (the time.sleep(0.2) line) of our animation program. This will cause Python to ignore this line because it is now a comment. Now try running the program.
Without the time.sleep() function call to intentionally slow down the program, your computer will run through the game loop as fast as possible. This will make the rectangles bounce around the screen so fast, they'll only look like a blur. Now you can see why it is important for us to slow down the program with this line.
Drawing Trails of Blocks
Remove the # from the front of line 90 so that the line is no longer a comment and becomes part of the program again. This time, comment out line 42 (the windowSurface.fill(BLACK) line) by adding a # to the front of the line. Now run the program.
Without the call to windowSurface.fill(BLACK), we do not black out the entire window before drawing the rectangles in their new position. This will cause trails of rectangles to appear on the screen instead of individual rectangles. The trails appear because all the old rectangles that are drawn in previous iterations through the game loop don't disappear.
Remember that the blocks are not really moving. We are just redrawing the entire window over and over again. On each iteration through the game loop, we redraw the entire window with new blocks that are located a few pixels over each time. When the program runs very fast, we make it is just one block each time. In order to see that we are just redrawing the blocks over and over again, change line 90 to time.sleep(1.0). This will make the program (and the drawing) fifty times slower than normal. You will see each drawing being replaced by the next drawing every second.
Summary: Pygame Programming
This chapter has presented a whole new way of creating computer programs. Our programs before would stop and wait for the player to enter text. However, in our animation program, we are constantly updating the data structures of things without waiting for input from the player. Remember in our Hangman and Tic Tac Toe games we had data structures that would represent the state of the board, and these data structures would be passed to a drawBoard() function to be displayed on the screen. Our animation program is very similar. The blocks variable held a list of data structures representing things to be drawn to the screen, and these are drawn to the screen inside the game loop.
But without calls to input(), how do we get input from the player? In our next chapter, we will cover how our program can know when the player presses any key on the keyboard. We will also learn of a concept called collision detection, which is used in many graphical computer games.


0 comments:
Post a Comment